One of the first experiences I had with emulation occurred when I was a teenager using MS-DOS. I didn’t understand what emulation was at the time, not even conceptually. I was a burgeoning programmer to be sure, using all sorts of wonderful technologies like BASIC, QuickBASIC, C compilers to write simple programs. As a result, my experience was very narrow. I had even written primitive assembly language programs on more limited platforms like the Atari 800 XL. Impressed yet? Despite all of this vast experience, I was very naive about my new found hobby, if you can believe it.
On one fateful day, I was browsing the “hot downloads” on my local BBS and decided to download a curious program called “ZSNES,” which is a software emulator for the Super Nintendo Entertainment System. Once I had that downloaded and unpacked, I ran the main program and began looking through the menus. I did not understand the concept of a ROM file. I did not understand BIOS dumps. I did understand emulation. Did I let that stop me? After a bit of Internet sleuthing, I came across the required files fairly quickly. The Internet was a different place in the 1990’s, and it was trivially easy to find all manner of “unsavory” files. Back then, there was no stigma against ROM dumps or game backups, and lawyers were blessedly ignorant in this area, so things like music and small games were shared freely. Movie sharing needed to wait until technology in general grew up.
Once I had loaded my chosen ROM into the emulator, and it should be noted that I owned this game at the time, I was greeted by an all too familiar “tink” and the “Nintendo Presents” text on the screen. I could not believe what I was seeing, and I do not have the words to elaborate on how this experience altered my perception about how computers really worked. Save states anyone? Game Genies codes couldn’t hold a candle to this product of coding sorcery.
The revelation that I could now play SNES games on my computer was a song that needed to be sung and I was the new village preacher. Well, technically, I had a congregation size of one, maybe two if you included my cat and he didn’t have the same passion on the subject that I did. I could tell. The games looked fantastic on my VGA monitor and sounded great on my stereo (I used an FM transmitter). The experience far surpassed playing on my ho-hum console. As I started poking around the application, I uncovered all manner of technical details around how the SNES worked. It’s funny how I never gave the inner workings of game consoles much thought prior to this moment. I was the kind of teenager who wanted to take everything apart to reveal their secrets, much to the chagrin of my father, who wanted nothing more than for me to put that stereo back together right now and without any missing pieces this time! I had all kinds of interest in how computer games and programs worked, but consoles in my mind, were just different beasts altogether and completely inaccessible to me as a programmer.
This was true from a certain point of view. Console programming was a dark art, unless you had the blessing from the pantheon responsible for distributing development kits and technical manuals, and even if you had those kits, much of the development process was DIY. It was common for programmers with hardware knowledge to create their own interfaces and tools to make development and debugging easier when building games for these platforms, or even possible in some cases. The companies didn’t hold your hand and feed you websites filled with API documentation and pre-configured development machines.
This technical sleuthing into how this emulator worked sent me down a technical spiral that lasted a couple of years. I was changing the microcode in the ROM files to alter a game’s behavior. I was writing tools that dumped cartridge data and helped me piece it all together again. In one project, I wrote some code that dumped the tile-set for the Legend of Zelda: A Link to the Past, and then hacked an editing program called HyruleMagic to export the palettes and the tile maps, so I could color and organize the tiles. I used those colored tiles to build a small, boring Zelda game. I loved it.
Fast forward many years later, and my perspective on the gaming industry has changed significantly. While I have mostly lost that sense of wonder and magic around seeing programs like this for the first time, I can still feel that thrill on rare occasions. I still enjoy writing software, but for different reasons. I also see emulation from a very different angle now than I did on that day. I have never looked at emulation as a way for me to play illicit games. My parents supplied us with enough games, and I can afford to buy any game I want to play now. I also do not seek to collect massive numbers of games in an attempt to collect them all, a digital archive wasting away on a hard drive in my closet.
I see emulation as the only means to preserve technological and entertainment history. The outer shell of a console can be rebuilt, games can be archived, but if the details around the inner workings are not documented in excruciating detail, the technology required to run those games will be lost to time. Emulators serve as a great archive of how the machine worked, even if the software does not replicate the physical electronics, they do replicate the behavior of the system in so far as the logic, data, and processing are concerned.
Hardware eventually dies. Components stop working. The smallest component on a circuit board that has failed can cause the entire system to fail. Many people do not have the skill, time, desire, or the money to repair these machines, so they are resold or passed on, where they are eventually discarded by inheritors as junk. In time, the hardware supply will run out, and if emulation is not available, there would no longer be a way to experience the games of the past. You don’t need to go back very far in time to see this being played out with machines from the 1950s, 60s, and even later. There is a YouTube! channel called “Usagi Electric” whose owner takes the viewer on a journey around how the mechanics and the electronics are serviced from that era. It is not easy. The experts for those machines are retiring and passing on, and they are often key sources of information. Realistically, these machines never work when they enter his shop, and debugging one of those machines is a different problem than interpreting the symptoms. Unfortunately for Usagi Electric, there is precious little documentation available to those trying to resurrect them, even if there was an abundance when the machines were new.
The teams who write emulators are programmers who rarely work alone. It is often a team effort requiring several different kinds of skills. When you undertake a project like this, you need to understand the machine at a fundamental level. The companies behind these devices are not falling over themselves documenting how the machine works. It is exactly the opposite. Secrets abound in this domain and the companies behind this clever bit of engineering have zero incentive to document their hard work. As a result, emulator authors need to take the machines apart and try to build an understanding around how they work so that key systems can be simulated in software.
I need to underscore how difficult this job can be, even when trying to emulate relatively simple systems like the original Nintendo Entertainment System or Nintendo Gameboy. The process can require the knowledge and expertise in areas like hardware, software, and mathematics. Unrolling the functionality so that it can be accurately emulated is a large amount of work and these people are doing it mostly in the dark and for free. Earlier systems tended to be simpler with relatively few custom chips. Programmers could leverage hardware specifications for known chips to understand how they worked, but as the cost for producing custom chips went down, their use went up. Custom chips are rarely documented in a form available to the public, so they must be approached as a black box when trying to reveal their secrets. More sophisticated techniques for reverse engineering systems have been developed over the years, such as x-ray analysis or de-capping chips using chemistry or lasers. This knowledge is neither pervasive nor easily accessible for most hobbyists, and even if you could illuminate the guts of the chip, understanding what you are seeing is a whole different ball game, so they must rely on the results and the talents of others.
It cannot be overstated how unhelpful most companies are in this regard. Practically speaking, they do not want to legally separate the machine that runs the software from the intellectual property (IP) they are trying to protect. The console manufacturer doesn’t really care about the console from a money making perspective, it is primarily a delivery system for the products that do matter. The technical edge that a console has when it is first released, if any, is quickly overtaken by competitors in the market. A successful game franchise, like Mario Bros. for example, is a cash cow that keeps on delivering, year after year, console after console. As a result, lawyers abound in companies with IP to protect.
I understand their position and empathize with it. I do not think people should pirate software. While I enjoy the idea of playing a home-brew Zelda or Mario game, I understand and agree that these creations diminish the brand and could take the property to places they do not want it to go.
I also do not believe that the responsibility for preserving this part of our technological history should be entirely shouldered by the public. The unfortunate reality is that companies are constantly pushed to follow the money, and are incentivized towards building solutions that focus only on supporting the most lucrative software titles. This can mean that many properties get left behind and are no longer promoted or developed. As an example, Nintendo’s catalog of supported games through their virtual console platform continues to diminish after every new console release. What incentive do they have in providing the public access to the full library of games? Without emulation, the games that do not meet the cut are lost. Once a company folds, it becomes even more difficult to surface details about the platforms and the games.
Thus the responsibility for developing a solution to play these games falls to the public, and many emulator authors are actively punished for doing so. On the one hand, I do not think that the authors of a tool should be criminally responsible for building it. If I make high quality hammers and you decide to buy one and then proceed to smite your enemies with it, it’s not my fault simply because I made the hammer. On the other hand, there is a fine line here that is worth debating. While it is true that emulators can run custom software, it is also true that the primary use for such a product is to run commercially released software. Therefore certain companies aggressively defend their IP from these threats, and like the war on drugs, the defenders tend to go after the big fish.
There needs to be a balance, something in-between excessive prosecution and outright piracy. As a culture, things like games, film, art, music, and books are a creative part of the sociological fabric and shape us more than we would like to admit, we should all want to preserve these works so they can be enjoyed by future generations.
Cross platform programming is a labour of love. It’s also requires a large time investment to get it right, so you should only do it if you really need to. There are many technologies available to help you on that journey; if you are building an application, then you’ll probably take a different path than if you are programming a game, and it’s the latter scenario that I would like to dig into a bit.
Let’s suppose you want to program a small game that doesn’t require easy access to 3D hardware, fancy input devices, or the Internet. Okay, I probably lost most of you right there, but for those that are a tiny bit intrigued, let’s continue.
I have a lot of nostalgia around the MS-DOS platform. It was not the first platform on which I began programming, that honour belongs to the Atari 800 XL, but it was still a lot of fun to use and explore. Compared to desktops nowadays, it is obscenely limited, but back in the 80s/90s it felt quite the opposite. MS-DOS is a 16-bit operating system and native access to memory beyond 640 kilobytes was the stuff of fantasy. Luckily, that limitation was relatively short lived, and you could access heaps of memory (get it?) by leveraging DOS extenders, such as DOS/4G, DOS/32, or CWSDPMI. If they packed the right set of low level features, these run-time utilities were all enabled by your friendly 386 CPU, and allowed the adventurous programmer to enter protected mode and access much more memory. It is worth mentioning that 286 CPUs did support protected mode but they lacked important features, so it was never heavily adopted
Once you jumped the hurdle of available memory, there were other lions that would be programmers needed to tame. They also had cope with performance differences between CPUs (with or without co-processors), sound hardware, hard-drive storage (or lack thereof), video hardware, and input device support. Phew. As a result of all this variability, many MS-DOS compatible games were faced with cross-platform challenges on the same, err, platform.
Unfairly, this wasn’t an issue when faced with game console development. The company promoting a console could always choose to add new hardware, such as steering wheel for racing games or new ways of visualizing content, or even additional performance, but it couldn’t do so in a way that would break existing applications. Note that this isn’t necessarily true for consoles built in the last 20 years. For these machines, the hardware remains compatible, but the software involved could change a lot, which would require game developers to retool their application from time to time. That train of thought is inconvenient right now, so we won’t talk about that messy bit of reality for now.
During the 8- and 16-bit era, game consoles provided a stable environment to build games. This stability lead to lower production costs and faster delivery times. In reality, many companies chose to release their games on several different platforms which dirties the delivery waters a bit. We will sweep these software development complexities under the rug as well since the porting strategies used did not impact their code-base in the same way as cross-platform development would affect their projects today. For example, many companies had distinct implementations for each platform, and code reuse was the exception rather than the rule.
Ironically, given the eccentric nature of MS-DOS in its heyday which lead to all sorts of programming headaches, it’s surprising that using a current incarnation of MS-DOS today produces such a stable environment. All you need is the right level of abstraction. Sure, you could always choose to support MS-DOS and all of its gory hardware configurations, or you could target one configuration and enjoy all of that sweet compatibility. What is this magical solution? Well, this paradise of splendour can be had by leveraging emulators like DOSBox. Yes, the solution to the fragmented environment that is an MS-DOS gaming machine is the venerable DOSBox. It is an excellent way to release your game on dozens of platforms without writing a lick of extra code. Want to run your game on Linux? No problem. What about Mac? No problem. Any console with an open development environment and suitable performance characteristics can (and likely does) support DOSBox, or one the excellent downstream projects like DOSBox-X. This means, your game can run on all of those supported platforms too. Go on, grab some MS-DOS development tools and get coding!
I began work on this unit several months ago. I am a father of three beautiful, very active young girls, and a husband to a gorgeous wife who likes to do renovations, so my free time is not what it use to be. Like so many projects nearing completion, I am overwhelmed by the sheer number of things which could be improved or done differently. Indeed, if I were going to do it all over again, I would do things differently and I imagine I would save a great deal of time, money, and headache. But that’s why people who love to build things dive right in, yes we make mistakes, yes the quality may not be top notch (but this is something that improves the more you build) and yes it may be expensive but the alternative is to sit on the sidelines and not do anything, or do it so slowly that it never gets finished.
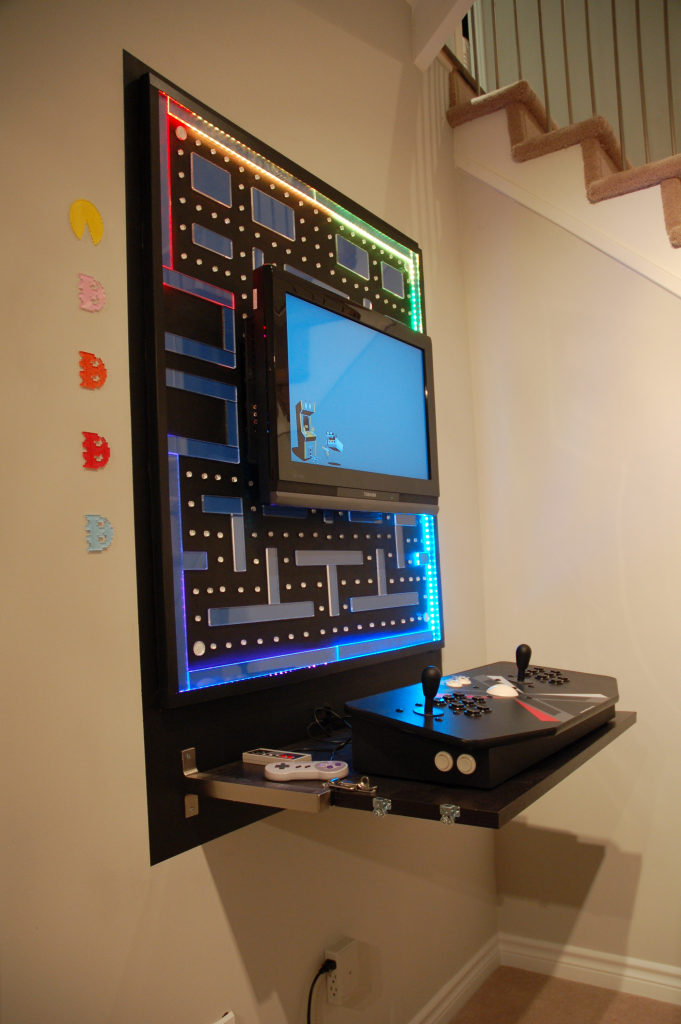
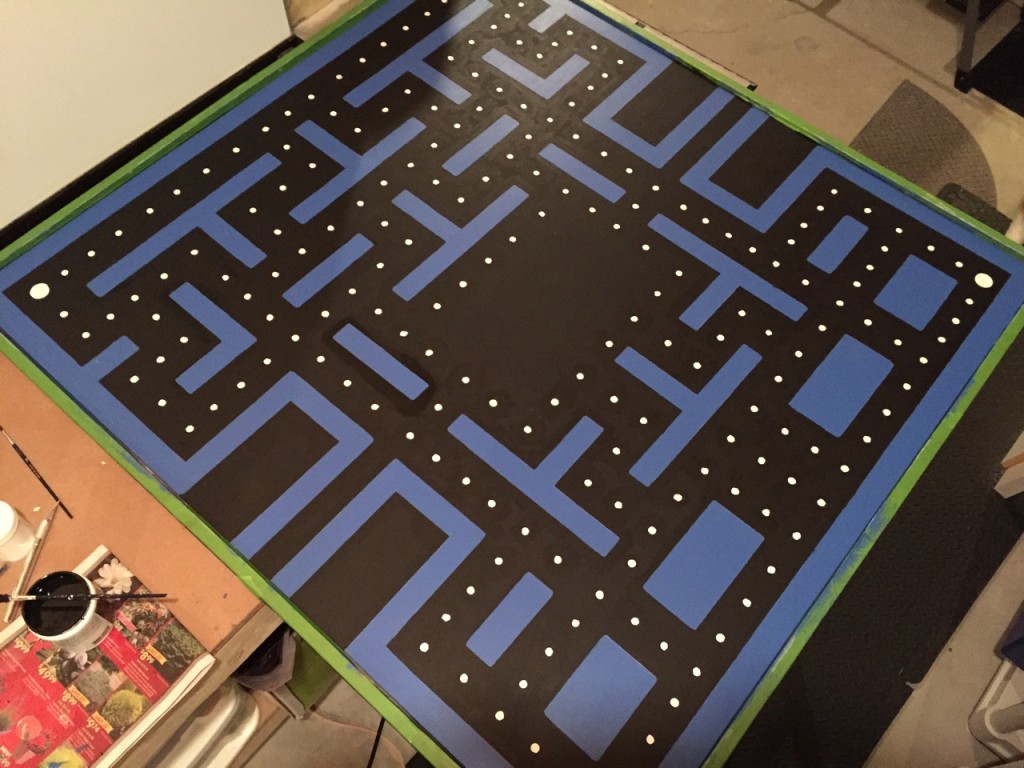
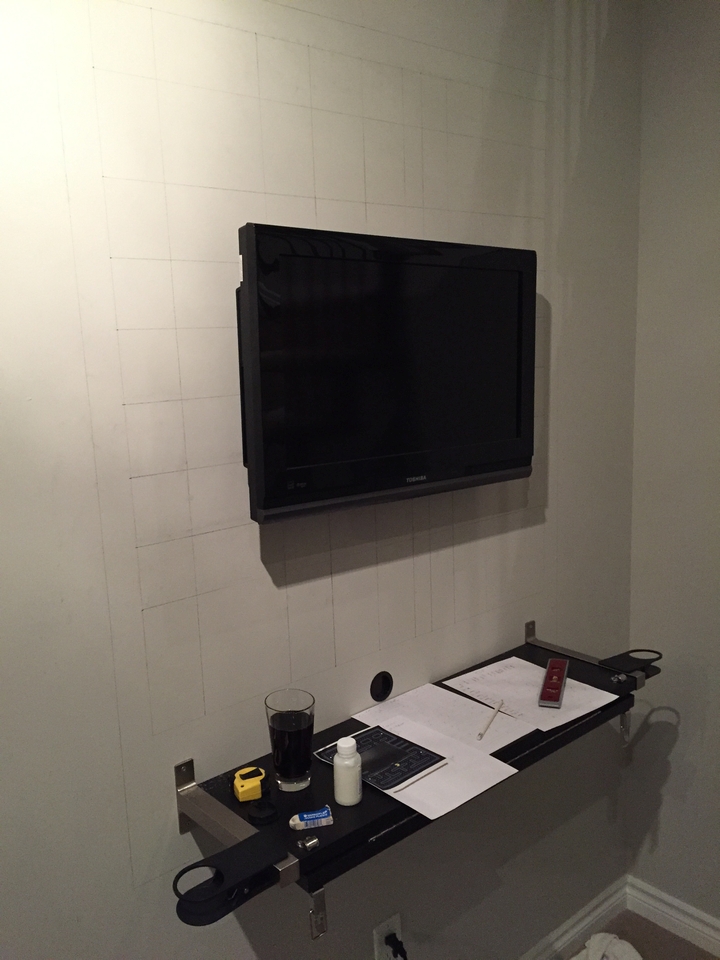
This project had many pieces to it and it’s still not 100% finished. The first step was to source and figure out what the first set of materials was going to be. The project as of a few weeks ago looked something like this:
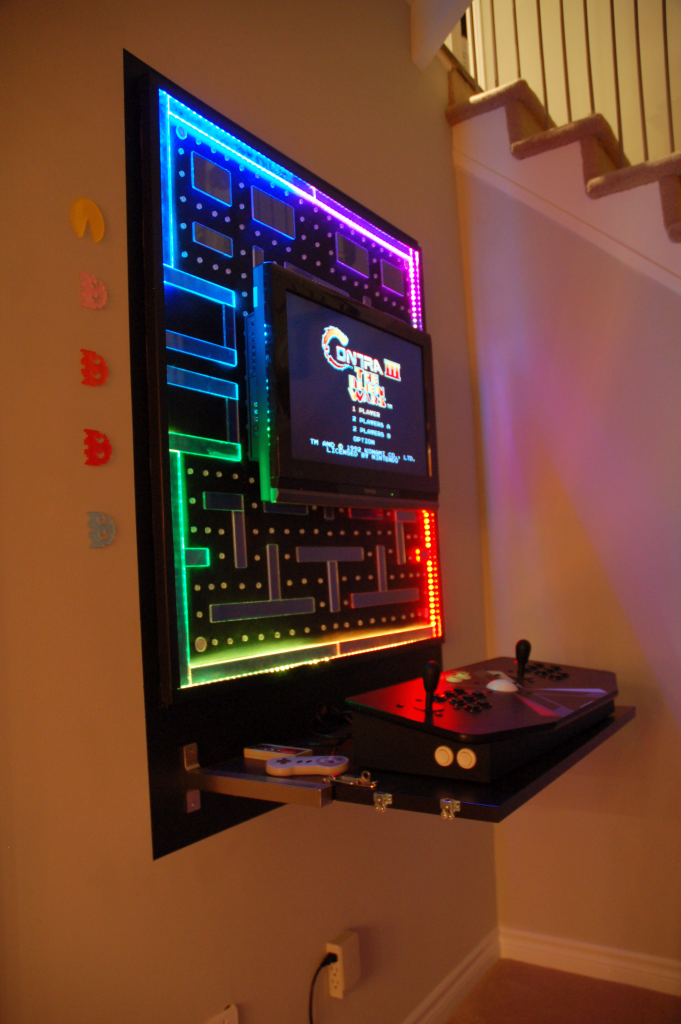
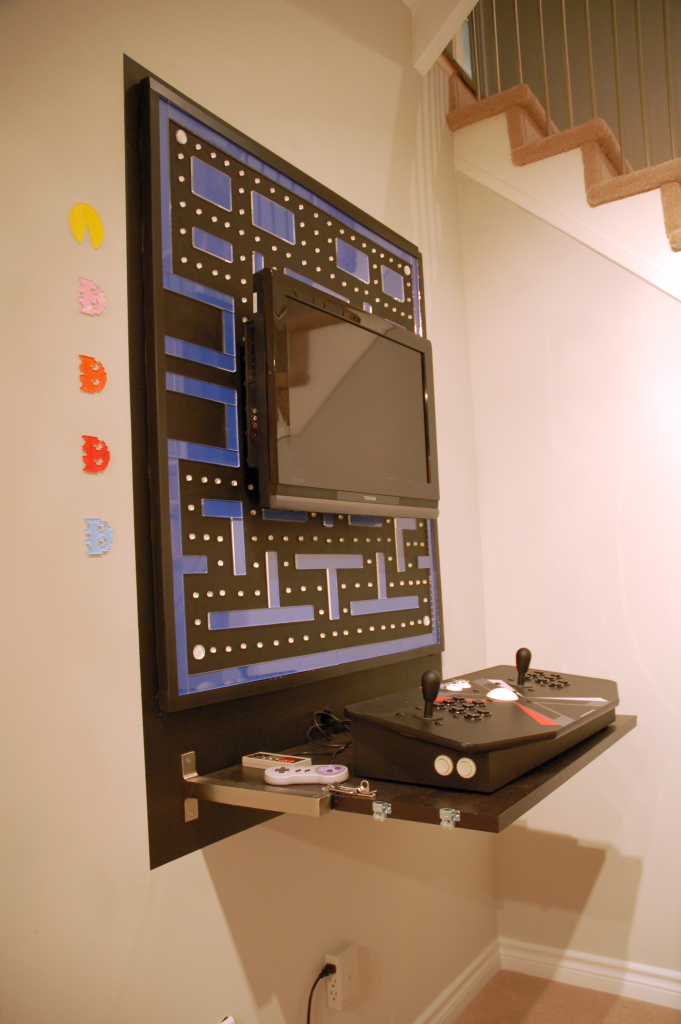
It consists of a themed wall panel, mounted flat screen high-definition television, an extended shelf, an X-Arcade Tank Stick, 257 individually addressable RGB LEDs on the inside edge of the panel, cup holders and a few decorations. The software driving the arcade is custom and consists of the primary server that controls the execution of the games, a mobile client application for selecting the games to play, and another server driving the decorative elements.
The first steps in designing the physical exterior for the arcade involved selecting appropriate materials. This process can vary a lot between projects, but I usually start by determining the theme and any special features or effects I want to add. For example, I knew that I wanted to place LEDs on the inside edge of the frame, so I needed to choose a material that was thick enough and could be easily cut into pieces that were less than an inch wide. I also needed that material to be easily mountable to the outside edge of the frame. I wanted the light from the LEDs to diffuse through the pieces on the board, thus creating an illuminated display. I bought a few 24×12 pieces of clear acrylic. Before doing that, I had researched some acrylic material that was built for optimal diffusion, but it turned out to be too expensive, so I chose to stick with clear acrylic.
The panel was assembled in a more complicated way than I would have liked. I was trying to reuse some plywood so instead of buying a piece of wood that was exactly the size I needed, I chose to assemble the pieces of plywood and glue them against a backing panel made of MDF. That worked, but it consumed considerably more time and there was fussiness around getting the edges lined up (due to the slight inaccuracies from various cutting tools). Anyway, after the pieces were glued, screwed, sanded, and trimmed, I painted the panel with a mat black undercoat. First using latex paint, then switching to oil based. I switched because the latex just wasn’t giving me the kind of mat finish I wanted. Whether or not the paint was acrylic or oil-based likely didn’t matter, it was probably the formulation for that brand that had the most impact on the finish. I happened to have oil based black on hand, so I used that rather than spending more money on a different brand of latex paint.
The board pieces needed to be designed before the acrylic material could be cut. I used Adobe Illustrator to design the pieces to be cut from 12×24 inch panels. The laser cutter available to me through the public library requires that the thickness of the lines in the design be less than 0.001 inches. When cutting acrylic be aware that the smell is quite unpleasant and should be ventilated. It takes about a day for most of it to dissipate from the cut pieces; I left it out in the garage overnight.
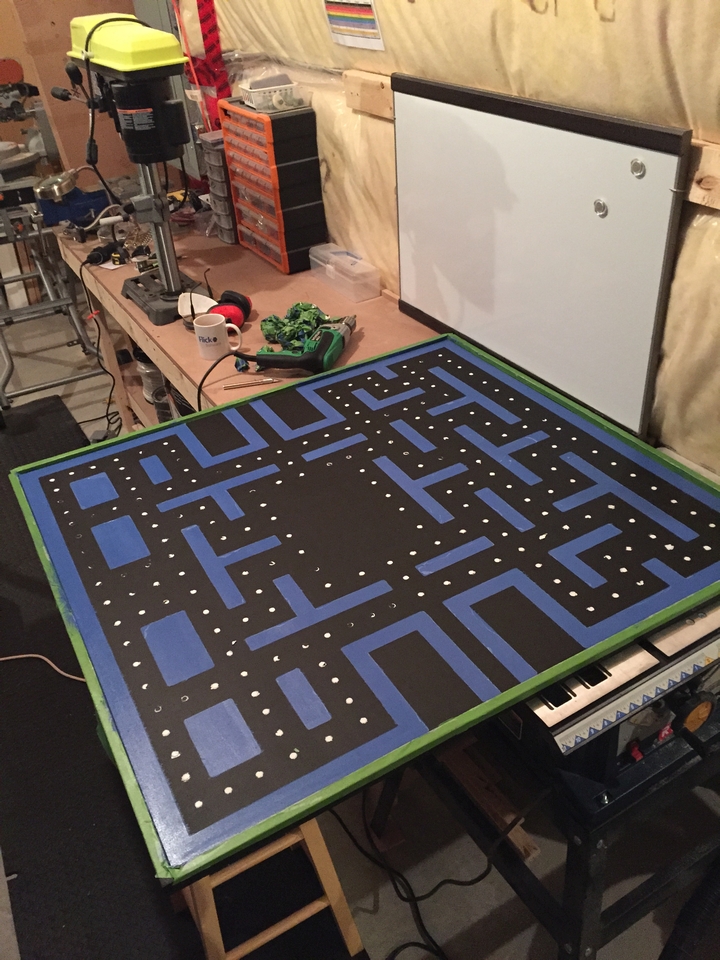
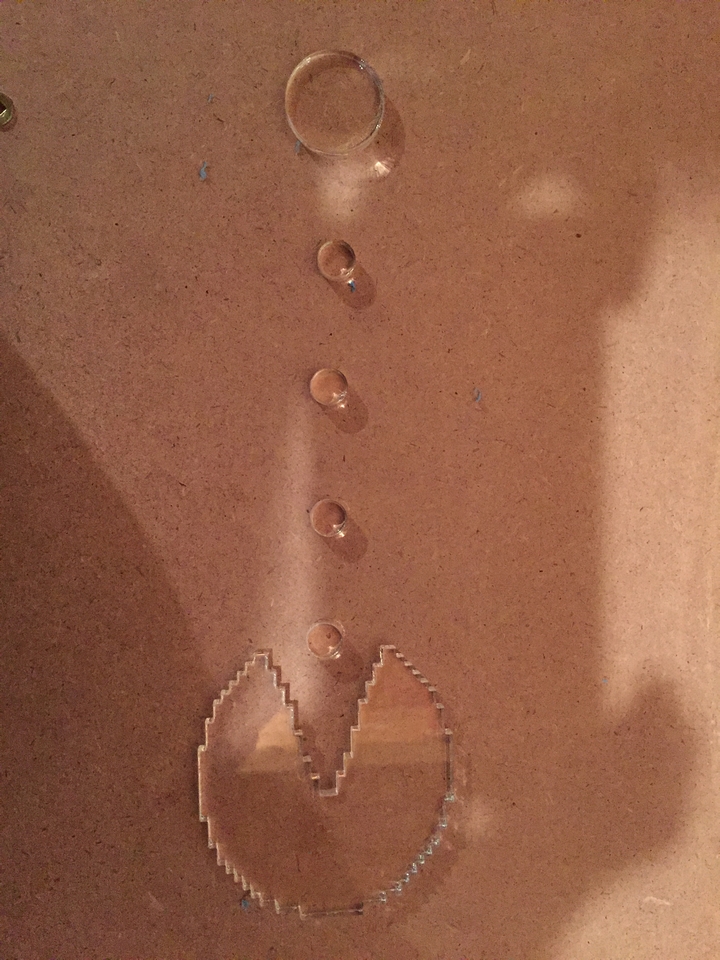
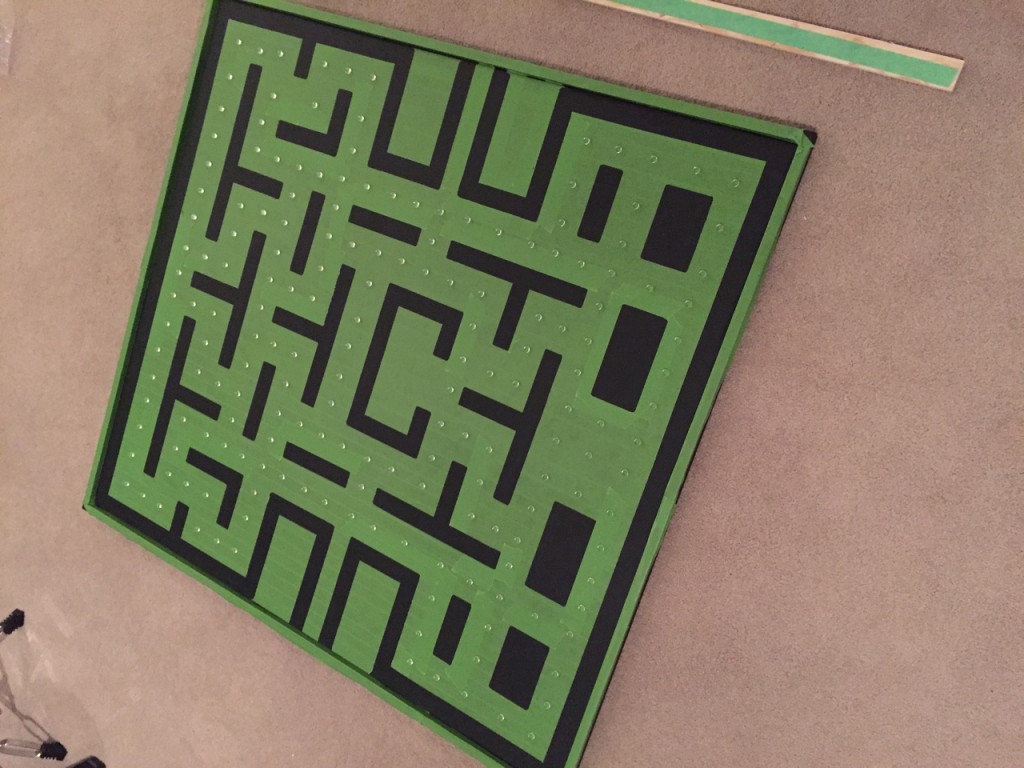
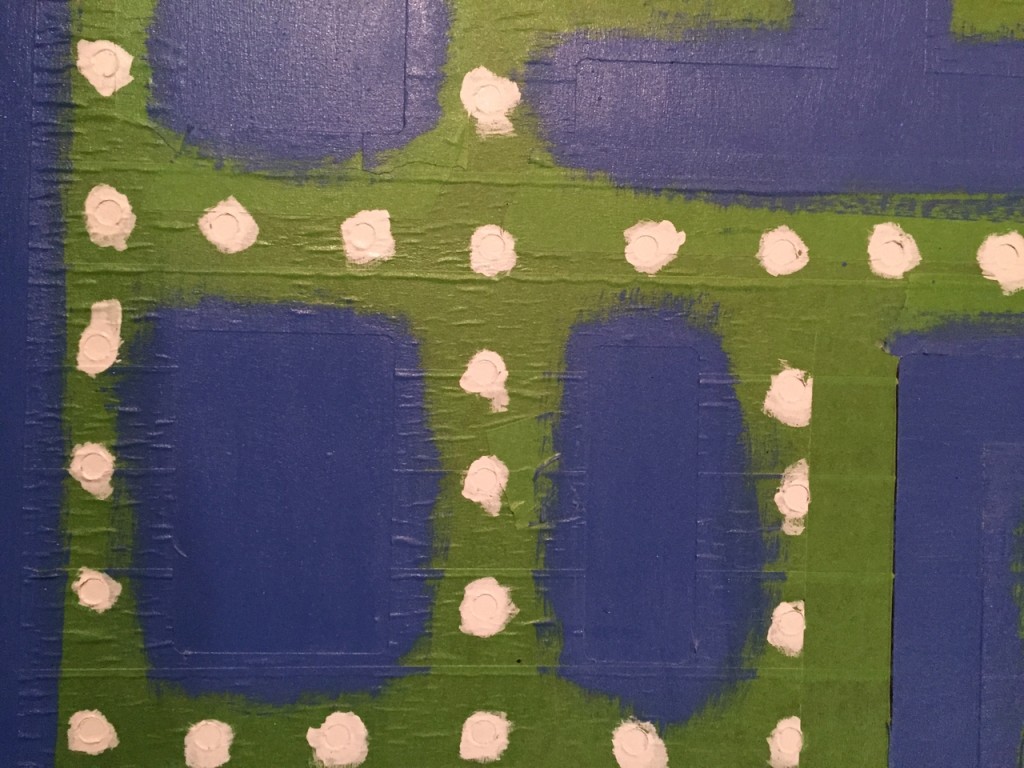
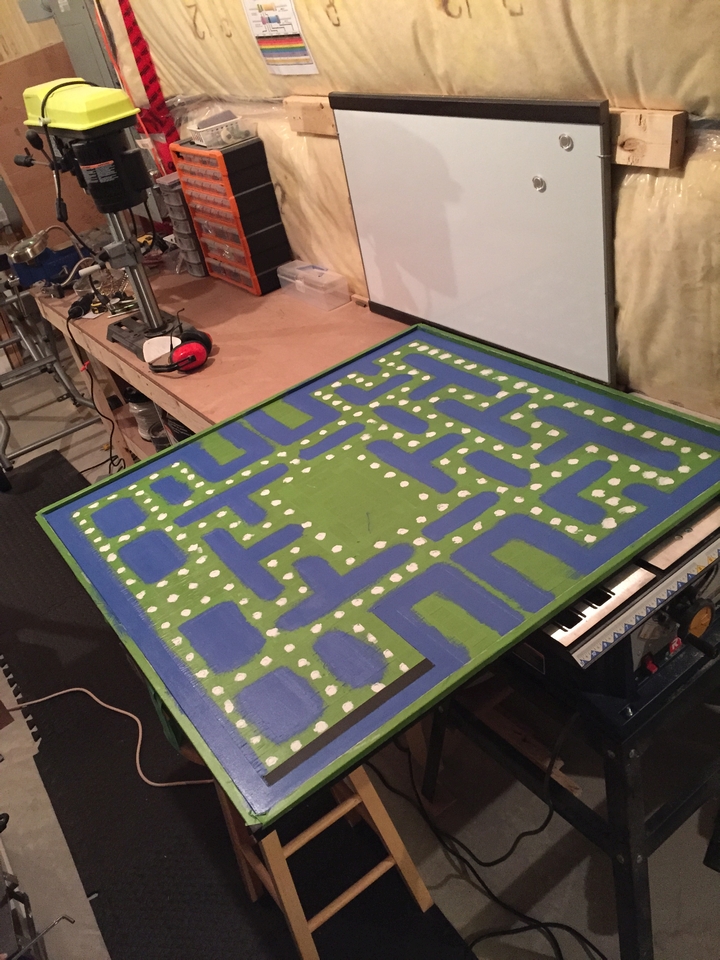
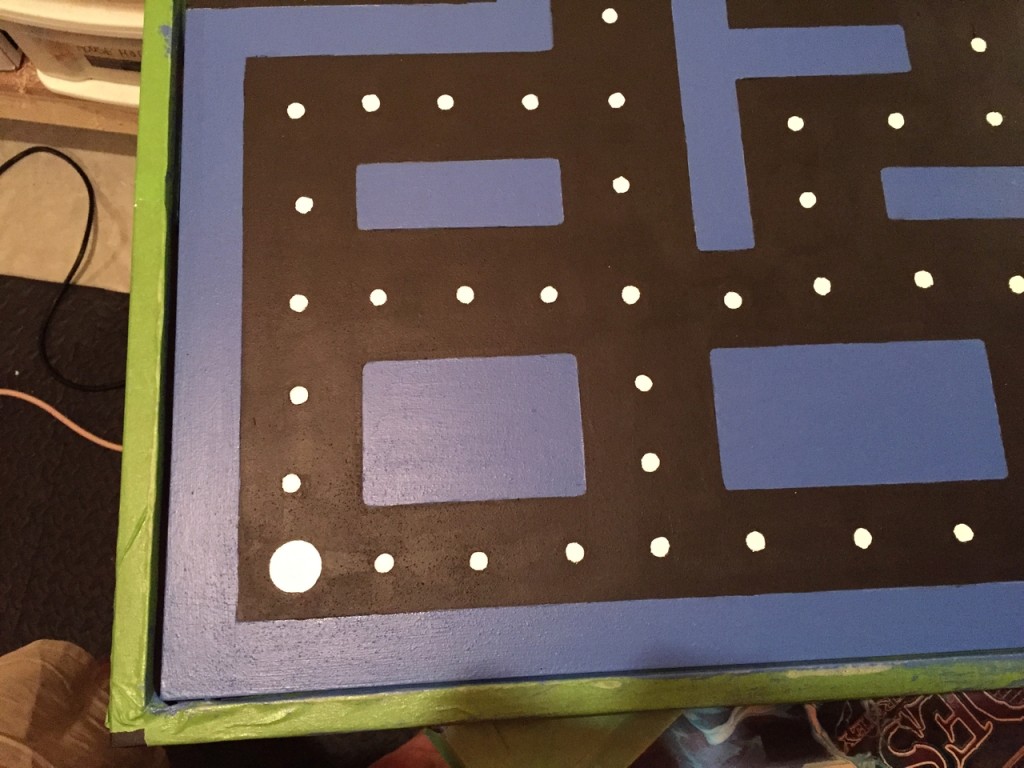
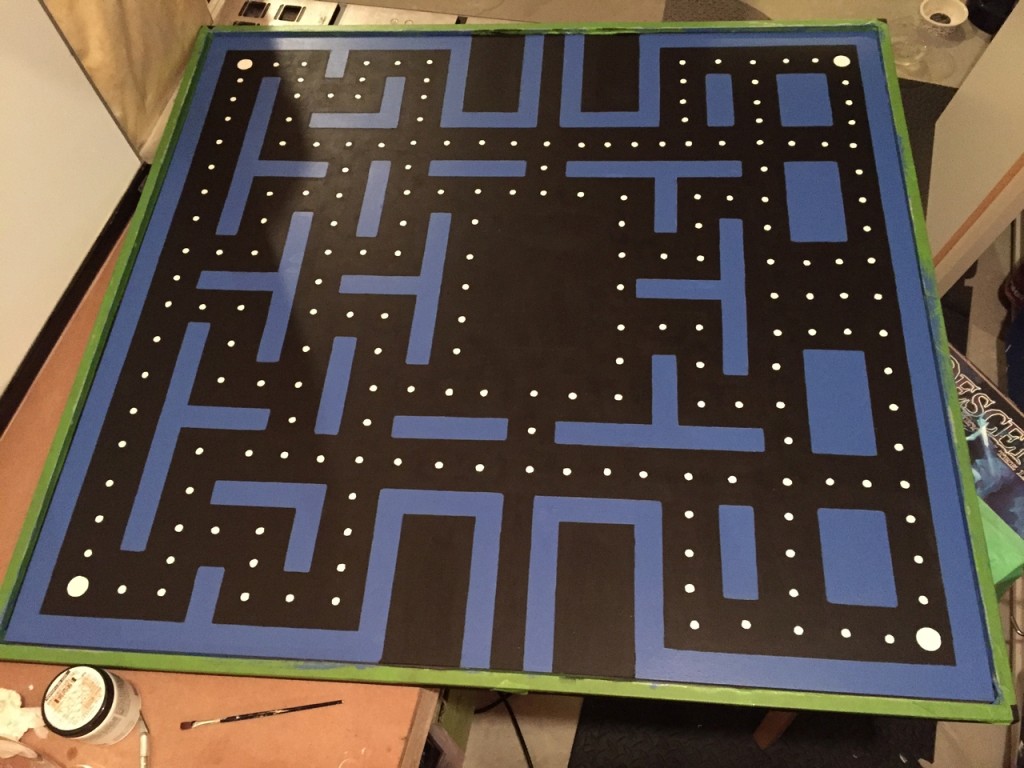
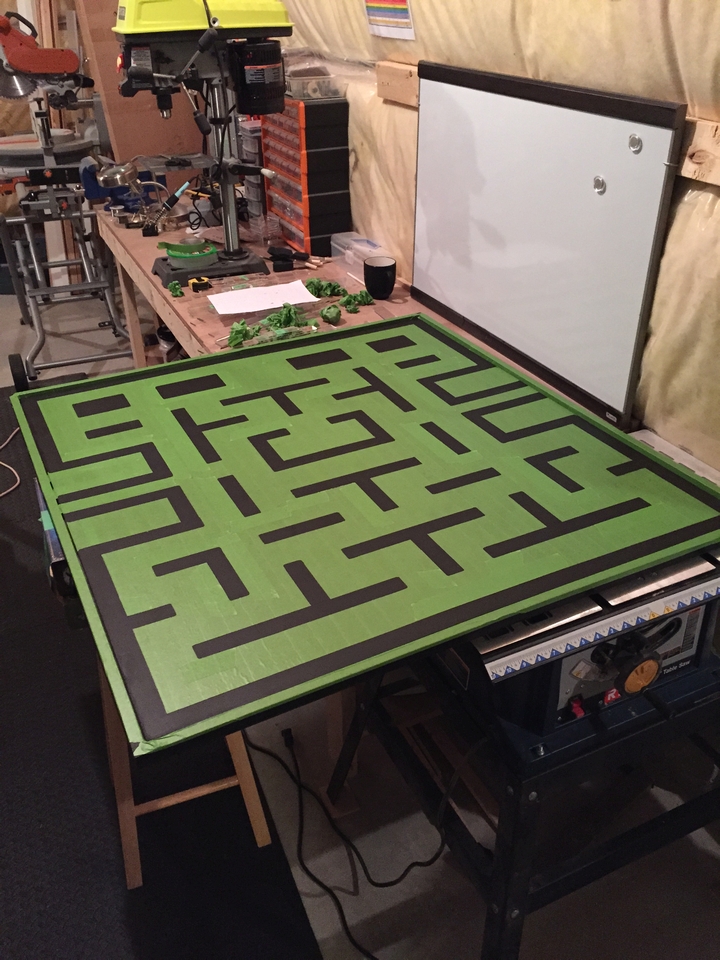
In order to transfer the Pac-Man like game board pattern to the painted base, I chose to tape the entire surface using painter’s tape. Following that, the acrylic pieces need to be laid out and traced, including all of the pellets from the pattern. Once traced, I cut them out with an X-Acto knife, and then created a special, circular drill bit to cut out the pellets. I chose to use those threaded wire funnels that come with light fixtures, but I needed to grind the bit for the edges to become sharp. Once the tape for the board pieces was cut out and removed, this exposed the flat black surface for paint.
The painting process was tedious and not very interesting, so I am not going to mention it anymore. This whole approach worked, but it was very time consuming and error prone as the paint needed to be touched up in many areas due to bleeding. I would recommend taking a different approach, if you were to do something similar.
The gluing process was almost as tedious as the painting process since the glue could not be applied on top of the painted area as it would have been visible if it sat between the painted surface and the clear acrylic. It also wouldn’t have dried because the type of glue I used, Weldbond, requires exposure to air for curing. Instead, I applied the glue to the edges of the game board pieces (except for the pellets) using a needle. Ouch. The recommended approach above would have also made gluing the pieces to the board a lot easier as I could have used any kind of glue, rather than searching high and low for a specific kind of glue that was both strong and dried clear.
In retrospect, the result would have been faster and higher quality if I had thought to paint the underside of the board pieces in the desired color first before gluing them to the board. This would have made the painting and the glue selection process a lot easier and is the approach I would take if I were to build another one.
I modded a couple of Ikea shelves to provide an extended platform so that my Tank Stick could sit comfortably, provide enough room for drinks and extra game-pads for other systems if necessary. It also provided some distance away from the screen so that players didn’t feel too close to it. I fastened them together using some latching hardware and strong clips so that the shelf could be folded if desired.
The panel was mounted flush with the wall using four metal clasps screwed into each corner. I wanted the arcade to have more of a built-in feel, encompassing the joystick shelf and the panel, so I painted a region around the arcade giving it more of a framed in look.
The television was mounted using a levelled bracket. I wanted it to be as close as possible to the panel and for the bracket to not be easily visible when standing next to the arcade on either side. I found a mounting system suitable for my needs and at a relatively cheap price at Ikea. When designing the panel in Adobe Illustrator, you must leave enough space for the bracket, otherwise you’ll be peeling off some acrylic pieces later and making some last minute cuts and holes.
I included a few characters in the design such as Pac-man and the ghosts: Inky, Blinky, Pinky and Clyde. The were cut from acrylic and then painted on their opposite sides using some colourful latex paints. The Home Depot sells small “tester” paint samples which are far too small for a wall, but perfect for small projects like this one. I painted the undersides of the characters (by this point I had caught on to the better approach) and mounted them on the wall next to the arcade using some crazy glue in gel form.
I also bought some black, textured plastic sheets from a plastics company called Canus Plastics. The sheets were about 1/8″ thick and could be cut with an X-Acto blade. After cutting them into strips, I used them as trim around the perimeter of the panel, which give it a more finished look and help to shield some of the light coming from the LED strips. The RGB LED strips were installed in a gap between the main panel and the edging. I bought a 5-foot length from a seller in China for a reasonable price. You can find them for sale in North America but the price can be much higher. The strip must be powered and driven by a micro-controller, so a little time must be spent on what to do with the wires. I have my arcade mounted on a wall that is finished on one side, so it was easy to hide a lot of the wiring for power, input devices, and video cables through the wall. If you were trying to install this on a wall that was finished on both sides, or which covered a foundation wall, then you may want to consider routing the cables through a hole and down the inside of the wall to another location.
There are many multi-cade system’s in the market these days. I like the look of some of them and many are closed systems where expansion and experimentation are difficult. However, I have never enjoyed navigating through the various menus and settings from the arcade screen itself. I did not want to have a keyboard and mouse installed when I need to select a game, or to try and use a joystick to navigate around. As a side note, you can use the X-Arcade buttons and a trackball as a mouse, if you’re interested. Anyway, basically I wanted the system to be simple and intuitive without all of the difficulties around emulation and desktops. I wanted my father to be able to use this system without needing to know what a ROM image was or what sort of commands were needed to load a game or fire up an emulator. I also wanted other players to be able to look through the games and see what’s available while others were using the arcade. I tried other front ends that try to abstract the underlying emulators like Maximus Arcade, but I found that their application was unstable (at the time) and required tedious tuning of mapping the underlying emulator to it’s execution scheme.
Once I knew I needed to write my own arcade front-end, I knew I wanted it to be a service that could accept commands from different clients running on different operating systems. The primary purpose of the server is to allow the user to play games, so it needed to run games made for hardware other than personal computers, such as the Super Nintendo Entertainment System (SNES), TurboGrafx 16 (TG-16), or an Arcade game. This requirement meant that the host platform (the machine and the OS running the server software) needed to emulate the other hardware, so it needed to be capable of running a game like Star Fox and the server software at the same time. The software emulating these other platforms are called, naturally, emulators and there are sometimes different program options available for the same system. The all have various technical limitations so some thought must be given as to which software you should use for your arcade.
The basic interaction model I wanted was a client application running on one or more mobile devices and a server installed on the machine running the arcade, which is just waiting to launch a game when one has been selected on the client. In addition, the server needed to be relatively easily to extend so that new emulation platforms could be added later. There are basically three primary pieces to the overall server platform:
A database to hold and manage the information about the platforms, games, and the system.
A server to drive the communication with the client, read content from the database, and to launch and control the emulation software.
Scripts to wrap and control the life-cycle of the emulation software. These are executed by the service when a game has been selected on the client.
I chose to use Qt as the primary windowing, communications, and UI SDK in case I wanted to move the server application to Mac OS X or Linux at some point in the future. I also consider the API to be one of the best cross-platform APIs around for desktop applications. As it turned out, I ended up implementing platform specific functionality as some of the third-party software required particular bits of functionality in order for them to work together with the system I was building.
The service does several things, but the most important responsibilities are list below (in no particular order):
Provide the clients with a list of supported emulation platforms and games, including image content.
Provide some safe guards around multiple clients accessing and attempting to control the arcade at the same time.
Launch and terminate the emulation applications so that the arcade always returns to the same ready state when someone finishes playing a game.
Communicate with other services so that decorative elements can be synchronized with the games and platforms being used.
The client is an Android application, since I wanted it to work on the Ouya platform as well. The client presents the users with a simple connection method to the server (multiple servers are supported), platform selection, and game selection. I wanted to keep the client relatively simple so that game selection is fast and easy. As a minor feature, I wanted to the ability to take a screen shot of the currently running game, for high scores and other awesome feats, and then save it to the device so that it can be browsed and shared later.
There is a decorative component to the arcade that gives it a bit of bling and acts as an attract mode. The LED strips mentioned earlier require a micro-controller to control them. I wrote a service that runs on a Raspberry Pi and it receives commands from the game server when various events happen, such as launching a game. The commands are simple and usually contain a payload like an RGB colour. This allows the server to send different colours for each platform when a game is selected.
Home screenArcade Mania!Powered offLayoutMasking removedMasking layerPac-man and pelletsMasking layerPaintingPaintingLaser cut acrylicLaser cut acrylicColoursPainting touch-upsPainting touch-upsPainting touch-upsLayoutLayoutmaskingPreparationWall measurementsInitial panelling
Without a doubt, this is one of the most difficult levels I have ever played for any game on the NES — incidentally, I don’t think I have ever finished it. Here is someone who played it through with barely a nick:
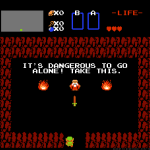
I have recently finished a small Ode-to-Zelda techno-art project that involved some readily available construction materials like plastic moulding, foam board, and 3/16″ MDF board, as well as some less common parts like custom circuits, Pixel Blocks, and laser cut acrylic pieces. In the end, it took around 4 months to complete the project, but someone else who has access to more free time could complete it much sooner, and by not ordering parts from China on eBay (it usually took 4-5 weeks to arrive). It was very enjoyable and a good learning experience even though the result is not something I would want to sell, due to the lack of polish. Here is a photo of the scene in the game and the finished project:
Legend of Zelda
Zelda Mural
It’s a representation of the first cave you come across in Nintendo’s pilot Legend of Zelda game. The scene illuminates with the flick of a switch on the left side of the frame. There is a flickering fire effect which is implemented via a couple of small circuits (5V) that are each driven by an Atmel ATTiny13-20PU 8-bit microcontroller and a series of low-power LED strips (12V). Since I wanted to drive the circuit with only one power supply, the project needed a small power regulation circuit to drive both loads.
Programming the flickering fire effect using the Atmel microcontroller can be tricky because it lacks a floating point unit and only has 1 KB of program space. This means that you can’t use decimal calculations lest the compiler pull in routines for floating point emulation, which result in a program too large to fit in the microcontroller. The solution was to employ a fancy sounding algorithm called a Linear Congruential Generator, which essentially provides the required randomness via a calculation that makes clever use of prime numbers. Early computers used this technique to achieve pseudo-random number generation at low computational cost.
The borders of the frame were printed using the graphics tiles copied from the game; the panels were sealed with rubberized paint spray and raised in a 3D effect using foam board, which itself has been painted and sealed for added strength and a semi-gloss, darker look. The letters have been laser cut from white acrylic using the font from the game; just a warning if you laser cut acrylic, it generates a nasty smell that is more than likely toxic, so get those laser cut pieces out in the open as soon as possible. I found the smell to dissipate after a few hours in the garage.
I love writing software for Microsoft’s DOS. I didn’t cut my teeth programming on this platform, that was done on an Atari 800 XL machine. However, it was on this platform that I was first exposed to languages like C and Assembly Language, and thus sparked my torrid love affair for programming which lasts to this day. The focus of this post is about DOS software development and remote debugging.
If you have done any development for iOS or Android, then you have already been using remote debugging — unless you are some kind of masochist who still clings to device logging even when it is not necessary. The basic concept is that a programmer can walk through the execution of a program on one machine via the debugger client, and trace the execution of that program through a debug server running on another machine.
The really cool part of this technology is that it’s available for all sorts of platforms, including DOS! Using the right tool chain, we can initiate a remote debugging session from one platform (Windows XP in this case), and debug our program on another machine which is running DOS! The client program can even have a relatively competent UI. For this project, the toolset we are going to use is available through the OpenWatcom v1.9 project, and the tools found inside that wonderful package will allow us to write 16-bit or 32-bit DOS applications and debug them on an actual DOS hardware target! In addition, we can apply similar techniques but this time our server can be hosted within a customized DOSBox emulator, which is also really cool since it allows you to debug your code more easily on the road.
The first scenario is the one I prefer, since it is the faster of the two approaches, but before we get into the details how to set this up, let’s consider some of the broader requirements.
You’ll need two machines for scenario number one. The DOS machine will need to be a network enabled machine, meaning it should have a network interface card and a working packet driver. I would recommend testing your driver out with tools like SSH for DOS, or the PC/TCP networking software originally sold by FTP Software. In order to use the OpenWatcom IDE, you’ll need a Windows machine. I use VirtualBox and a Windows XP Professional installation; my host machine is a Macbook Pro running Max OS X 10.7.5 with 4 GB of RAM.
The second scenario involves using the same virtual machine configuration, but running the DOSBox emulator within that environment. You will need to use this version of the DOSBox emulator, which has built-in network card emulation. They chose to emulate an NE2000 compatible card for maximum compatibility, and also because the original author of the patch was technically familiar with it. After installation, you’ll need to associate a real network card with the emulated one, and then load up the right packet driver (it comes bundled with the archive).
For reference, the network interface card and the associated packet driver I am using on the DOS machines is listed below:
D-Link DFE-538TX
These are the steps I have used to initiate a remote debugging session on the DOS machine:
Using Microsoft’s LAN Manager, I obtain an IP address. For network resolution speed and simplicity, I have configured my router to assign a static IP address using the MAC address of my network card; below is the config.sys and autoexec.bat configurations for my network
AUTOEXEC.BAT
@REM ==== LANMAN 2.2a == DO NOT MODIFY BETWEEN THESE LINES == LANMAN 2.2a ====
SET PATH=C:\LANMAN.DOS\NETPROG;%PATH%
C:\LANMAN.DOS\DRIVERS\PROTOCOL\TCPIP\UMB.COM
rem - By Windows 98 Network - NET START WORKSTATION
LOAD TCPIP
rem - By Windows 98 Network - NET LOGON michael *
@REM ==== LANMAN 2.2a == DO NOT MODIFY BETWEEN THESE LINES == LANMAN 2.2a ====

CONFIG.SYS
DEVICEHIGH=C:\LANMAN.DOS\DRIVERS\PROTMAN\PROTMAN.DOS /i:C:\LANMAN.DOS
DEVICEHIGH=C:\LANMAN.DOS\DRIVERS\ETHERNET\DLKRTS\DLKRTS.DOS
DEVICEHIGH=C:\LANMAN.DOS\DRIVERS\PROTOCOL\TCPIP\NEMM.DOS
DEVICEHIGH=C:\LANMAN.DOS\DRIVERS\PROTOCOL\TCPIP\TCPDRV.DOS
I load a TSR program, which I have built from a Turbo Assembly module, which can kill the active DOS process. I do this because the TCP server provided with OpenWatcom v1.9 does not exit cleanly all of the time, and will often lock up your machine. In the end, your packet driver may not be able to recover anyway, and you will need to reboot the machine, unless you can find a way to unload it and reinitialize. Incidentally, the packet driver does have a means to unload it, but when I attempt to do so after the process has been killed, it reports that it cannot be unloaded. The irony of the situation will make you laugh too, I am sure.
Navigate to my OpenWatcom project directory, then I start the TCP server which uses the packet driver and your active IP address to start the service. The service will wait for a client connection; in my case, the client is initiated from my Windows XP virtual machine using the OpenWatcom Windows IDE.
Ensure that the values for “sockdelay” and “datatimeout” are both “9999”, and make sure the “inactive” value is “0” in your WATTCP.CFG file. Even though the documentation says that a value of “0” for the “datatimeout” field is essentially no timeout, I did not find that to be the case. The symptom of the timeout can be onbserved when you launch the debug session from the OpenWatcom IDE and you see the message “Session started” on your DOS machine, but then the IDE reports a message the the debug session terminated.
These are the steps for the DOSBox emulator running within the Windows XP guest installation:
Install the special network enabled build of DOS Box mentioned above;
Fire up the NE2000 packet driver  (c:\NE2000 -p 0x60);
Start the TCP service
Note that I configured a static IP address on my router using the Ethernet address reported by the packet driver. You should not be able to ping that address successfully until the TCP server is running in DOSBox. While the process worked, I found the time it took for the session to be established and the delay between debug commands to be monstrously slow (45-90 seconds to establish the connection, for example) and as a result, made this solution unusable.
While working on a project, it can be really useful to create the assets on a modern machine and then automatically deploy them to the DOS machine without needing to perform a lot of extra steps. It can also be useful to have the freedom to edit or tweak the data on the DOS machine without needing to manually synchronize them. The solution which came immediately to my mind was a Windows network share. This is possible in DOS via the Microsoft LAN Manager software product and has been discussed before in a previous post.
It’s hard to believe, but DOOM (or Smashing Pumpkins Into Small Pieces of Putrid Debris as it was known in some circles) was unleashed upon the world as Shareware on this date in 1993. The game was so popular that Microsoft had contemplated purchasing id Software in an effort to promote Windows 95 as a top-notch gaming platform; Bill Gates even featured himself in a video fighting the creatures of DOOM head on. DOOM fever had reached high enough levels inside Microsoft that a special Easter Egg was placed inside of Microsoft Excel 95 with a DOOM-like level called The Hall of Tortured Souls. Over the years, much has been said about this game and the team that created it, so I will not echo that history here, but here are some of the things the DOOM franchise has birthed into this world since its release:
It has sold over one million copies, but it has been pirated and downloaded many more times than that
DOOM – The movie starring Dwayne John (The Rock)
Masters of DOOM Book
The source code for the game was released in 1997 spawning numerous source ports to other platforms and revamped engines
The game engine has been licensed numerous times, even for such projects as promoting breakfast cereals like Chex
For four years after its release, people continued to refer to other 3D games as “DOOM clones”
Way back on Feb 6, 2012, id Software released the source code to Wolfenstein 3D — 20 years after it had already been written. The source code release does not come with any support or assets from the originally released game. In fact, id Software is still selling this title on various Internet stores like Steam. I played around with a DOS port of the DOOM source code quite some time ago, but I had never bothered to try and build its ancestral project. Until now!
As it turns out, it’s actually quite straight-forward with only a minor hiccup here and there. The first thing you’ll need is a compiler, that almighty piece of software that transforms your poorly written slop into a form that the operating system can feed to the machine. For this project, the authors decided to settle on the Borland C++ v3.0, but it is 100% compatible with v3.1. I don’t know if more recent compilers from Borland are compatible with the project files, or the code present in the project produces viable targets, so good luck if you decide to make your own roads.
As per the details in the README file, there are a couple of object files you will want to make sure don’t get deleted when you perform a clean within the IDE:
GAMEPAL.OBJ
SIGNON.OBJ
You can open up the pre-built project file in the Borland IDE, and after tweaking the locations for the above two files, you should be able to build without any errors. The resulting executable can then be copied into a working test directory where all of the originally released assets are located, I believe my assets were from the 1.2 release.
There are also a few resource files you must have in order for the compiled executable to find all of the right resources. According to legend, the various asset files were pulled from a sprinkling of source formats and assembled into “WL6” resource files. A utility called I-Grab, which is available via the TED5 editor utility, produced header files (.H) and assembler based (.EQU) files from that resource content which allowed the game to refer to them by constant indices once the monolithic WL6 resource files were built. There are annotations in the definition files, using the “.EQU or .H” extension, with a generated comment at the top which confirms part of that legend.
The tricky part in getting the game to run properly revolves around which resource files are being used by the current code base. The code refers to specific WL6 resource files, but locating those resource files using public releases of the game can be very tricky because those generated files have changed an unknown number of times. Luckily, someone has already gone through the trouble of making sure the graphics match up with the indices in the generated files. The files have conveniently been assembled and made available here:
After unpacking, you’ll need to copy those to the test directory holding the registered content for the game. Note that without the right resource files, the game will not look right and will suffer from a variety of visual ailments, such as B.J. Blazkowicz’s head being used as a cursor in the main menu, or failing to see any content when a level is loaded.
Some bored, highly creative minds created a functional Google search page circa 1985, BBS style! Make sure your speaker volume is high enough to hear the bodacious hums, beeps, and cranananghhhhtttth noises coming from the virtual modem.
Originally, I was using a Matrox Millennium PCI graphics card in my DOS gaming box, but I found the 2D scrolling performance to be somewhat lacking as games like The Lost Vikings would shear while playing. The card also has virtually no EGA graphics mode support, which was important to me since I wanted to run games like Crystal Caves from Apogee, and I also wanted the development option of writing computer graphics programs written for this video mode.
Enter the S3 ViRGE (Virtual Reality Graphics Engine).
Interestingly, this was S3’s first attempt at a 3D graphics accelerator card. The performance was somewhat lower than expected, however, making the card only slightly faster than the best software renderers at the time, and equal to those renderers when anything other than the simplest 3D techniques were used. Because of the card’s poor performance, it was dubbed the “Worlds First Graphics Decelerator” by critics in the graphics and gaming communities.
I own the “DX” model of this card which is somewhat more performant than its predecessor, but I didn’t buy the card for how well it could render 3D graphics so it matters very little to me. I bought the card for how well it could accelerate 2D graphics and its support for lower end video modes, and it is very impressive thus far.