Archive for the 'Hardware' category
For the first time since I have owned an Amiga computer (you can read this as years in the making), the fix for an issue I was having was straight forward and quick! Starting about a year ago, I was getting a white screen from time to time; nothing too major, I just needed to reboot the system a few times, sometimes requiring that the system stay on for a minute or two between reboot cycles. However, today the system decided to not load into Kickstart at all after many reboots. The fix was to unseat the Paula chip, spray a little contact cleaner, and re-seat it. It booted into the ROM on the first try.
Categories: Amiga, Hardware
No Comments »
If you want USB thumb drives to work on FreeDOS out of the box on this hardware platform, make sure that the BIOS boot order has the USB drive before the Compact Flash drive. There is also no hot plug support, so insert your thumb drive into the device before you boot. Lastly, I would hazard guess that not every thumb drive will work. I used a Kingston DataTraveler 1GB USB stick.
Categories: FreeDOS, Hardware, PC, Programming
No Comments »
I recently installed all new capacitors, a couple of new voltage regulators, new thermal paste, and a Buzz-Off Kit by Obtainium Gaming. That new kit works a treat. It really reduced the buzzing noise coming from the speaker. It works by introducing a new audio amplification circuit that can be installed further away from the power board. You don’t use the old audio amplifier once you are done.
However, I have a new issue, and I have no idea where it is coming from. Whenever I move the analog stick on my controller in any direction, audio feedback is produced. The audio feedback increases as you move your controller further towards the direction you are pushing. If you are aware of the problem and know how to fix it, or if you even know the cause, then please leave a comment!
I am also getting a bit of curving to the graphics towards the top of tube. I think this can be adjusted, but I am not sure how to go about doing it yet.
Categories: Hardware, Vectrex
No Comments »
Some months ago I had purchased an Amiga 500 from eBay. It was a modded Amiga which was advertised to be “tested and working!”, so I was hopeful I would be getting something fun to use. I eventually received the package, unboxed it, and turned it on; it booted and I played around with the Amiga desktop and a few games. It was late in the evening and I was tired, so I shut it down and returned to it the next day. After booting it up the second time, the screen went black. Uh-oh. Repeating the process a few times, the result was the same. I knew next to nothing about the details around how to use an Amiga, let alone the common faults exhibited by the hardware. I was disheartened. I wanted to mess around with my recent purchase and get familiar with its features. I wanted to do some exploratory testing, and have a bit of fun in the process.
I had to make sense of this problem, so I turned to the Internet for help. I did a bit of searching, read up on the hardware, and then a whole lot more of the same over the next several days. As with any great technical mystery, there are numerous possibilities that could lead to a black screen of death. Little did I know, that I would be seeing many different screen colours on my journey to resurrect this classic machine. In order to understand the steps involved, it is important to set the context and get a generalized feel of the environment.
Let’s start at the beginning…
There are some things you should know about the Amiga before deciding to buy a machine for yourself. As with many things in computing, there may be more than one way to do something, and there can be many, many exceptions to a given statement. It’s important to understand that there are several revisions to the Amiga 500 motherboard available, and the hardware involved can change depending on the revision. I own a Revison 6A. Thus, the problems I encountered and the solutions I investigated will focus around that board. The board you own may exhibit the same symptoms for similar problems. I do not have enough experience to comment on other boards, but there are large communities of Amiga users on the Internet who have the technical chops to help with most issue. Finding that person or digging up the right information will take time.
Related to the subject of hardware revisions, it is also important to note that the Amiga uses several custom computer chips. They are named: Denise, Paula, Agnus, and Gary. It also has a couple of less interestingly labelled chips: CIA (ODD and EVEN), and the CPU. The CPU is a Motorola 68000, or one of its pin compatible relatives. I won’t go into the technical details of the chips here, since there is in-depth information available elsewhere. When attempting to source parts for your machine, if you suspect that one of your chips is damaged for example, be aware that the form of the chips can change across the set of system board revisions (“Fat” Agnus vs “Thin” Agnus, for example). There are also different manufacturers of the various chips and different revisions of the same chip. It is important to understand what chips are available and which ones are compatible with your system board. The chips are becoming more scarce with every passing year, so expect to pay higher prices on sites like eBay. If you are lucky enough to encounter a machine at a garage sale, snatch it up if it seems like a good deal; machines that no longer work and still have their original chips sell for higher than expected prices on-line.
I would also like to make special mention of the CIA chips. There are two of them in the Amiga 500. Over time, they are very prone to failure, more so than any of the other custom chips on the system board. If you suspect that one of those chips is not working correctly, one common diagnostic methods is to swap the EVEN chip with the ODD chip or vice versa. They are functionally identical. Once swapped, if the system makes it further into the boot sequence then that may point to faulty chip.
Interestingly, the system board is a bit of a marvel in system design. Major chips can be removed and the hardware will continue to function in limited ways. Naturally, some pieces of hardware are more critical than others, but it is fascinating to see how the computer behaves if one of the core chips is removed. Not surprisingly, this simple approach can be useful to help diagnose failing hardware.
Amiga computer were much more successful in Europe than in North America. From Wikipedia, “The machines were most popular in the UK and Germany, with about 1.5 million sold in each country, and sales in the high hundreds of thousands in other European nations. The machine was less popular in North America, where an estimated 700,000 were sold.” If you are experiencing video related issues, then be aware that some descriptions or solutions may be targeted around markets that use PAL instead of NTSC as a video standard. There are a couple of differences in how the machine is wired up, specifically around jumper settings and clock speeds, but for the most part, the machines will work the same in Europe or North America. If you do buy a European machine, you will need to convert the PAL signal into an NTSC signal, or learn how to modify the system board to produce the right video standard; the power supplies will also be different, so you will need to buy one that is compatible with your region.
Relating to power supplies specifically. These little workhorses can fail or degrade over time and produce voltages that are too low or that spike dangerously. It is always a good idea to test your power supply with a multi-meter first and ensure the voltage being produced is correct and doesn’t vary significantly over time. There are a variety of new power supplies available on the market that work differently, and produce stable, reliable power. They also are less heavy and are typically smaller in physical size that the original versions. Many older supplies can emit a distracting hum or other noises; buying a new one eliminates that problem.
The Kickstart software is used to bootstrap the system and prepare it to boot off of the system’s bootable volume. Originally, the software was provided via floppy disk for the Amiga 1000 and new versions could be easily made available by making new disks available for purchase and distribution. When the Amiga 500 shipped, the Kickstart software was put onto a ROM chip and boots automatically during start-up. Installing a new ROM chip is definitely not as simple as using a new floppy disk, so many people simply did not upgrade. As far as the Amiga 500 is concerned, Kickstart v1.2 and v1.3 are the most widely used versions.
It is also worth knowing about memory in an Amiga. Confusingly, there are three types: slow, fast, or chip RAM. In a nutshell, chip RAM was usable by the system’s chips directly, but not anywhere else. Slow and fast RAM could be used universally, but the former was only available via an expansion board, while the other lived on the system board.
There are many ways to modify your Amiga computer. Some product lines have more options than others, but the Amiga 500 line of computers is one of the most fortunate in terms of diversity for new and legacy products. I won’t go into specific products because there are many and their availability changes rapidly, but here is a short summary.
- Display output can be changed to support HDMI;
- Graphics output can be changed or replaced with new hardware;
- CPUs can be replaced and new hardware features can be added;
- Floppy drives can be replaced with USB or SD card alternatives;
- Hard drives can be used with USB or SD card options;
- Side car expansions;
- ROM chips can be replaced with new versions;
- Replacement cases in different colours;
- New input devices;
- Custom chips will eventually have FPGA replacements.
There are also numerous whole system replacement options, such as the Minimig or a system with a console flavour, such as the Amiga 500 Mini. If you want to leverage your computer and are only interested in running the software, using a licensed emulator such as Amiga Forever is also a fantastic option.
In my opinion, all of those options are very good for the Amiga community as a whole. Buying an original system isn’t in the cards for everyone and can come with a high price tag over time. More importantly, it is simply not possible or desirable for many Amiga users to try and repair their system when it eventually succumbs to the ravages of time, heat, and use.
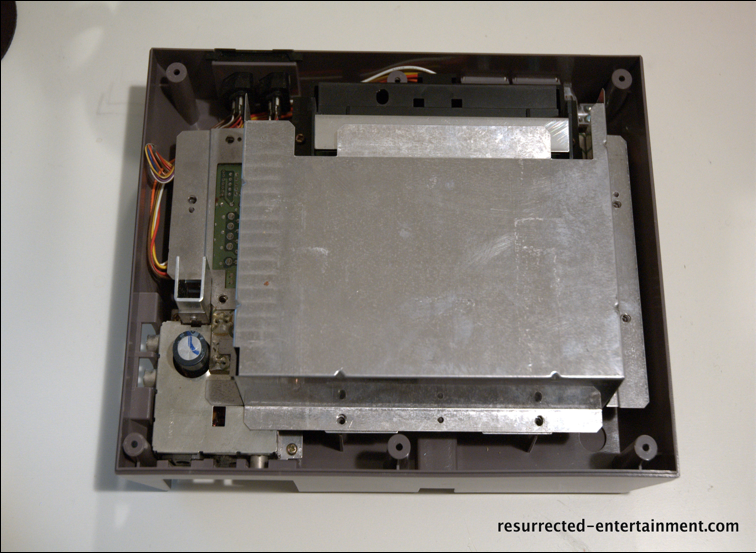
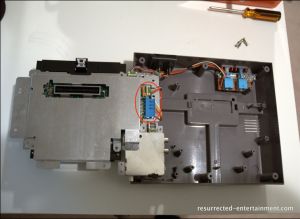
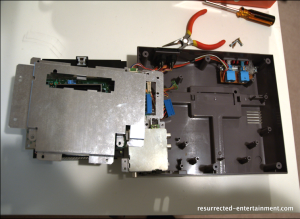
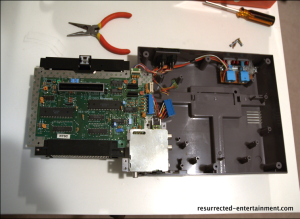
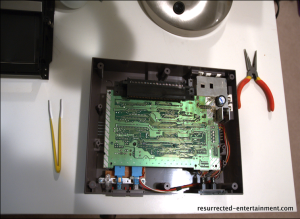
With the context out of the way, we can now focus on the issues I was seeing with my system. My system had already been modded by the previous owners to support a few of the features I mentioned above:
- HDMI support;
- CPU had been enhanced with an accelerator board called Terrible Fire;
- Memory board expansion;
- Kickstart ROM had been replaced with one that could switch between versions via a physical toggle switch;
- CompactFlash drive support.
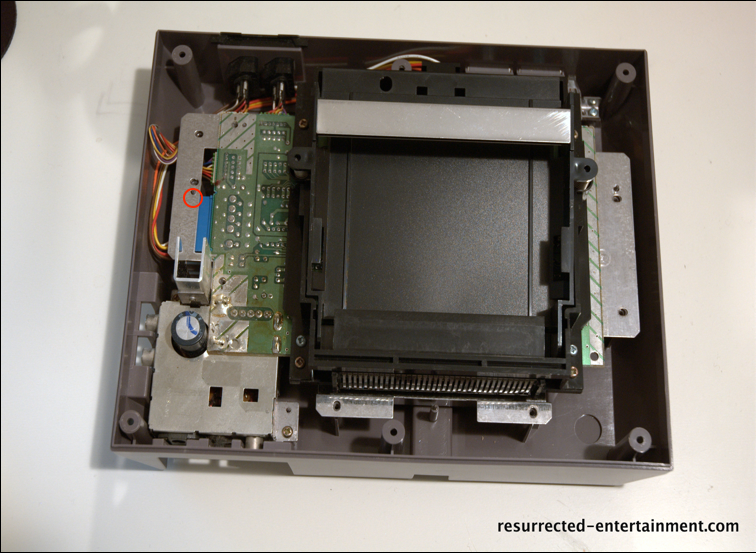
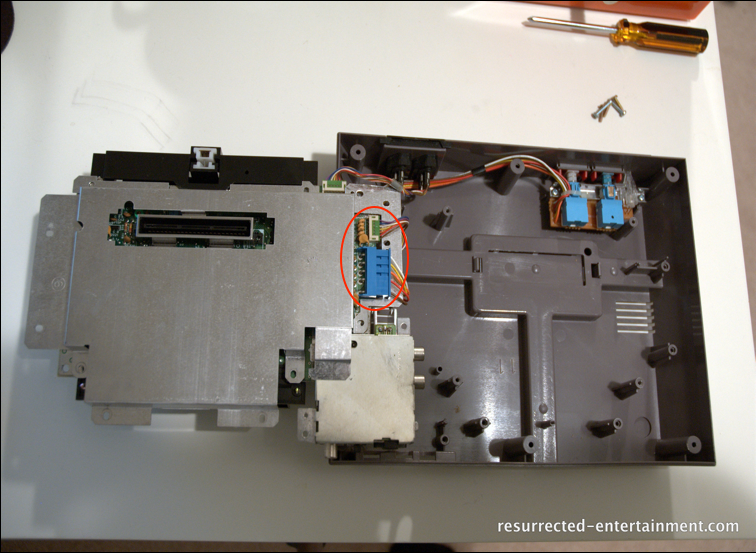
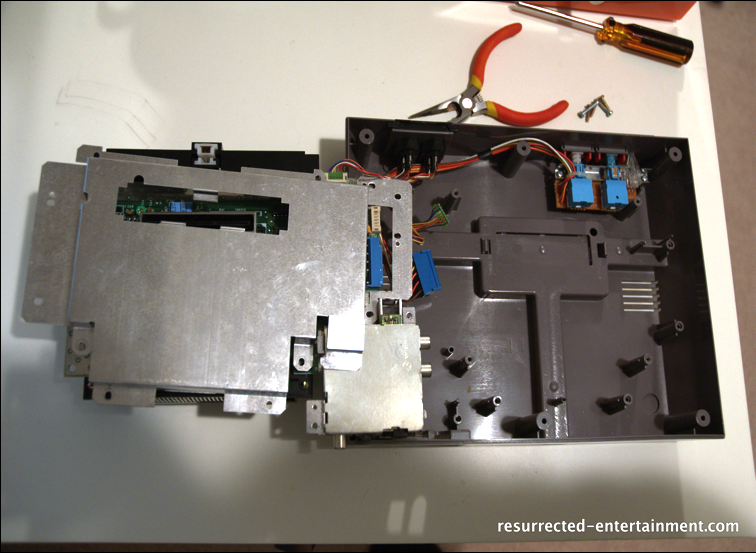
When diagnosing a problem with the a complex system, it is always useful to try and eliminate as many variables as possible. In my case, I needed to strip the system down to its core essentials and see how it was behaving. Unfortunately, I did not keep sufficient notes to know which steps I took in what order, but here are the various investigations I did over a couple of months:
- Checked the NTSC/PAL jumper was configuration (JP4);
- Re-flowed every chip on the system board (adding new solder or replacing old solder);
- Replaced the ROM socket;
- Replaced the CPU socket a couple of times (once with a cheaply made socket and the second with a much higher quality socket);
- One of the legs of a resistor on the board was floating, which was preventing the Gary chip from getting power, so I soldered that down (I think I had mistakenly removed the solder);
- Replaced all of the capacitors on the board with higher quality versions;
- Replaced the CPU with a different version;
- Swapped the CIA chips with each other;
- Used the DiagROM to help me search for faults;
- Tested composite output (RGB was not working at the time);
- Replaced the various cables;
- Did a “press-test” on all of the chips to try and find fault related to loose solder joints or sockets with oxidation on their wipers;
- Used contact cleaner on all of the sockets and cleaned the legs for all of the chips using sockets;
- Replaced several secondary chips, such as the multiplexers around the Agnus chip;
- Replaced all off the RAM and added sockets to the system board;
- Used a multi-meter and an oscilloscope to try and narrow down the electrical issues.
- Fixed a few prior repair attempts by previous owners that had resulted in electrical traces being pulled off the board;
- Traced many connections visually using a magnifying glass and a multi-meter – the Amiga 500 has many traces on the front and back of the board, so this process took a very long time;
- Reviewed the data sheets for 90% of the chips on the board and verified voltages and signal flows – this also took a very long time;
- Purchased working versions for most custom chips so that I could swap my versions out;
- Purchased chip testers, such as the Retro Chip Tester Pro, to verify that a few of my secondary chips were good (very useful for RAM testing).
- Fixed the JP2 configuration; this was causing a lot of memory-related symptoms!
In the end, I did get the system working; I had a couple of periods where I put the machine away for a week or two, just to clear my head or wait for parts. Overall, I found the process of debugging the issues to be enjoyable, but it was sometimes difficult to endure the ups and downs and I was tempted to recycle the unit and sell off the parts. Many times I was anticipating a working system once I had a resolved the most recent uncovered issue, only for a new problem to surface, and I needed to start again.
Over the course of the project, it was very expensive to get the machine up and running. If you repair these machines as a business or a hobby, then the various purchases I made could be seen as an investment. In my case, I only own one Amiga 500 machine, and I am unlikely to ever buy another one, so all of these purchases were essentially sunk costs. Some of the hardware may be useful in the future, depending on how the machine survives, but we shall have to wait and see what develops.
Today, my Amiga is essentially unmodified. I do use an SD card as a hard-drive , a floppy hardware emulator, a switchable Kickstart ROM, and a new game pad. In the future, I will also be using a wi-fi modem as well.
Categories: Amiga, Hardware, Repair
No Comments »
I installed an Atari 2600 RGB modification to my 4-switch console a few weeks ago, and it works like a treat. I use it in conjunction with an 8-pin mini DIN to Euro SCART cable. I then plug that cable plus the audio cable from the modification into an OSSC converter box. The resulting picture quality is crisp, vibrant and breathtakingly beautiful on a 46″ LCD television. Well, as beautiful as you can get, given the limitations of the console hardware.
Categories: Atari 2600, Hardware
1 Comment »
I took a chance on this little Windows computer to solve a couple of problems:
- I needed a portable Windows game platform
- I needed something small with an appropriate number of USB ports (for joystick support)
- I wanted it to be quiet with very few zero fans whirring and humming
Right out of the gate, I was impressed with this machine. Forget about gaming for a second, this is an excellent machine for those wanting a Windows “desktop” computer without wanting or needing a large machine or laptop. This machine is so small you could easily attach it to the back of most monitors. It has friendly set-up process that everyone in your family should be able to follow with little difficulty (assuming they’ve touched a Windows computer in the last 5 years). The performance is excellent for those wanting to do a little e-mail, web browsing, etc. I have an interest in using it for games, but nothing 3D or with extremely heavy weight processing requirements.
Categories: Game Development, Hardware, PC, Projects, Windows
No Comments »
Originally, I was using a Matrox Millennium PCI graphics card in my DOS gaming box, but I found the 2D scrolling performance to be somewhat lacking as games like The Lost Vikings would shear while playing. The card also has virtually no EGA graphics mode support, which was important to me since I wanted to run games like Crystal Caves from Apogee, and I also wanted the development option of writing computer graphics programs written for this video mode.
Enter the S3 ViRGE (Virtual Reality Graphics Engine).
Interestingly, this was S3’s first attempt at a 3D graphics accelerator card. The performance was somewhat lower than expected, however, making the card only slightly faster than the best software renderers at the time, and equal to those renderers when anything other than the simplest 3D techniques were used. Because of the card’s poor performance, it was dubbed the “Worlds First Graphics Decelerator” by critics in the graphics and gaming communities.
I own the “DX” model of this card which is somewhat more performant than its predecessor, but I didn’t buy the card for how well it could render 3D graphics so it matters very little to me. I bought the card for how well it could accelerate 2D graphics and its support for lower end video modes, and it is very impressive thus far.
Categories: DOS, Game Development, Games, Graphics, Hardware, PC, Retro
No Comments »
I learned a little while ago from a friend of mine that the North American version of the NES is somewhat crippled in the audio department, when compared against its Japanese counterpart. The NES hardware supports five channel audio and the hardware did not permit companies to add additional sound channels. The reasons for doing are unclear but is most likely attributed to the limitations placed on North American developers in an effort to regulate the quality of the NES games being produced; in Japan, for example, the game companies were not limited to simple hardware mappers, they were allowed to add additional hardware into their NES cartridge designs. One example of this is the VRC6 chip created by Konami and used in the Japanese version of Castlevania III: Dracula’s Curse.
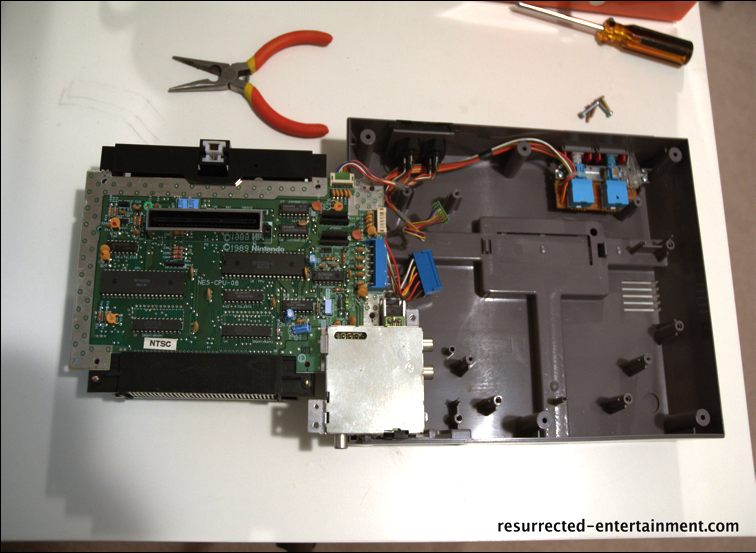
If you are using the PowerPak, then you can perform a simple hardware mod which allows you to tap these additional music channels. Most of the work is simply removing the casing, hardware shielding, and cartridge harness. The last step is to solder a 47-ohm resistor to pins 3 and 9 on the underside of the board. I wanted to assemble a more complete walkthrough than what can be found on the Internet for those who are not use to doing this sort of thing.
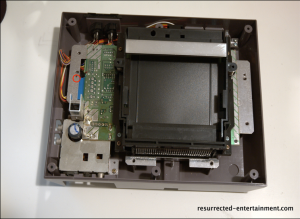
First, you see the interference shield.

Remove it, and then remove the screws securing it to the base.
Flip the assembly over so that the expansion connector is face-up. You will see two cables which need to be detached to remove the second interference shield. Be gentle when removing the cables and don’t pull the connectors out by the wires; the large plug pulled out easily by simply using my fingers, the smaller cable looks like the connector is snapped into place, but it’s simply a friction mount and can be removed with needle nose pliers by gently pulling and rocking the connector.
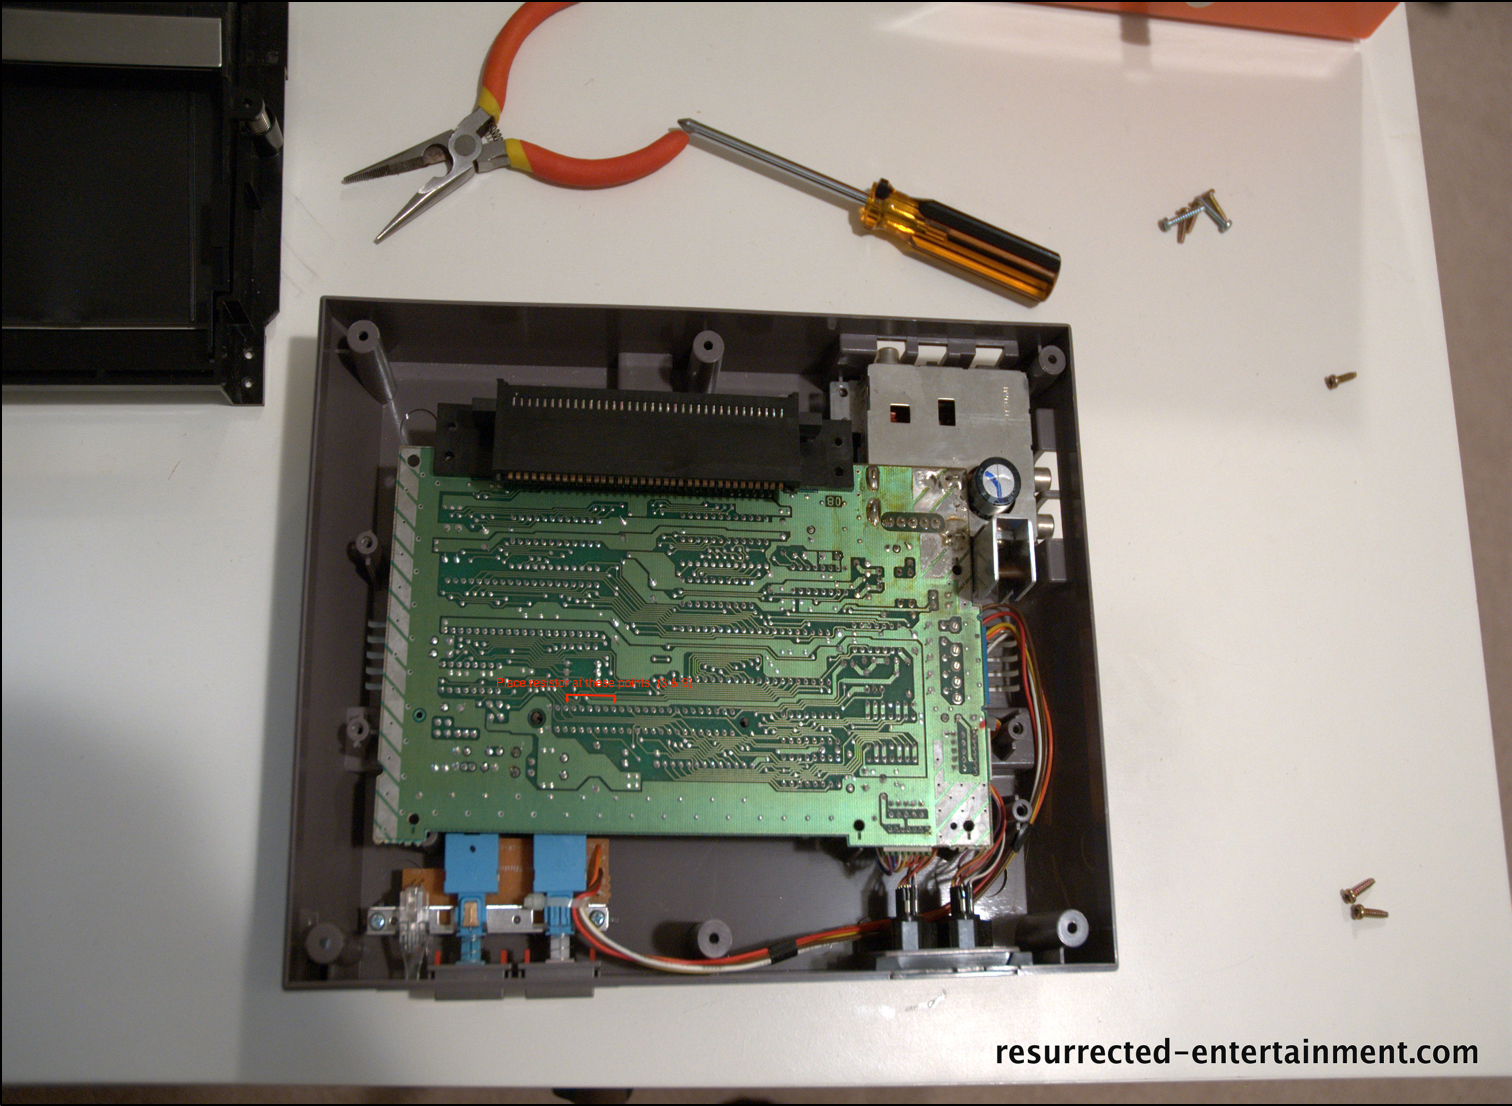
Once the shield if removed, you will see the main board and all of its components; stop and admire the beauty of this machine and smell the history. Ahhh. Now, flip the board back over and remove the last two screws for the cartridge harness. The harness slides under the cartridge slot and should be gently removed as components on the other side of the board may be damaged by your fingers if you are not careful.
Reorient the board as shown and locate the connector pins.

Carefully solder the 47-ohm resistor to pins 3 and 9 of the expansion bus, reassemble and you’re done.
Categories: Hardware, NES, Retro
No Comments »
Thanks to a generous friend, I had a chance to play around with the Oculus Rift last night. It was a little difficult to find a machine which worked completely with the Oculus hardware, but on the third try I struck pay dirt. The machine actually did work on the first computer, but the frame rate was choppy which made the experience a little more headache inducing than the designers intended — I don’t know what caused the choppiness but I suspect the HDMI driver on the laptop may be the culprit. The last machine did not have a choppy frame rate but did produce a blur when looking around, which I attribute to the refresh rate of the device. I downloaded the Oculus Beta for Half-Life 2 and played a couple of levels. It was fun but due to the resolution of the Oculus screen, it made it difficult to read text and see the pull-down menu for weapon selection in the game.
I found the device was a little on the heavy side to play comfortably for more than an hour or so. It comes with straps which help to support it on the left, right, and top of your head. These straps and the additional padding that was added really help with the comfort level, I am not sure I would have lasted 15 minutes without them.
The device provided a really nice illusion of depth and often found myself wishing I could reach out and touch the things I was seeing. A glove often used in virtual reality movies, and the less sexy versions used in real life, would provide the ideal input device but all those cables would certainly make a mess and you really feel a need for mobility while being immersed in your 3D world. Navigating with a keyboard is cumbersome unless you are a touch typist with an appropriate keyboard; if you could see the screen when needed, it would help a lot in this department (it would at least allow you to position your fingers correctly). I was thinking some sort of external camera would be very handy which could act as a window into the outside world. It would also be nice if the device could function in normal “2D” mode and the “3D” mode when required. Looking at the desktop through the headset is simply not usable, but if the device could be switch programmatically, then we have a working solution. Just make sure to provide support for dimming the screen and programmatic fade-in-and-out transitions to make it easier on the eyes.
Categories: Hardware
No Comments »
The device has a few quirks to it that you will soon come to enjoy; however, in order to make its hard love easier to bear I have come up with a nice list to follow if you are trying to use it:
1. Make sure the cable is IEEE 1284 compliant (the cartridge will report a size of zero, if the cable, or if any communication is disrupted between the cartridge and your computer).
2. I assigned the printer port to port 0x278 in the BIOS and in Windows; I also configured the port to use the EPP protocol v1.7.
3. I only use version 1.13 (1.3 depending on where you look) of the DreamWriter software.
4. You do not need the “pceboot.pce” file; ignore it, it’s for something else entirely.
5. When you select multiple ROMS for upload, the DreamWriter software will install a bootloader; however, it will install a Japanese version of it by default, instead of the U.S. version (assuming you are using a U.S. TurboGrafx system). Once you have chosen your ROMs (and have correctly set the U.S. region box for those Japanese games you want to play), you must select the “U.S. Region” checkbox in the lower left corner of the interface — this will ensure the right bits have been flipped on the Japanese ROM.
6. You must start the program after the USB power and printer cables have been connected; the switch labeled “SW” does not need to be “ON” for the upload to work; in fact, I have no idea what that switch does.
7. The program will never show you how much space is occupied on the cartridge (after a fresh execution), or which games have already been flashed, so don’t bother scratching your head. The DreamWriter software only knows how much space remains after writing a set of ROM files.
Categories: Hardware, TG-16, Windows
No Comments »
|